Setting up an Integration Scene in Unreal Engine 5
Introduction :
Having an integration scene is required in order to test our art especialy in the days of PBR rendering, here’s a way to create a scene in Unreal Engine 5 that will allow you to check if your assets are ready to be used in game. It’s good practice to integrate and test new assets during production in a separated scene from the game scenes and to have our own “Asset Zoo”.
We will want to check if we validated multiple conditions :
Is my asset nicely reacting to different light scenarios?
Is my asset at the good scale compared to our character?
Is my asset fitting the art direction?
Are my assets working together nicely?
Even if this tutorial is using Unreal Engine, the same principles can be applied to any game engines with PBR rendering and scene streaming.
Step 1 : Setting up the Persistent Scene

Our first step will be to create an empty blank scene, in order to do that we need to press : File > New Level… or Ctrl+N.
Save the map and name it based on your defined nomenclature for the project (I will use Map_Integration_Romain)
Once this is done, we will have an opened empty dark map with nothing in the outliner, this map will be our “Persistent” one where art will be sitting. Right now we have no lights, no post processing, no fog… just pure abyss.
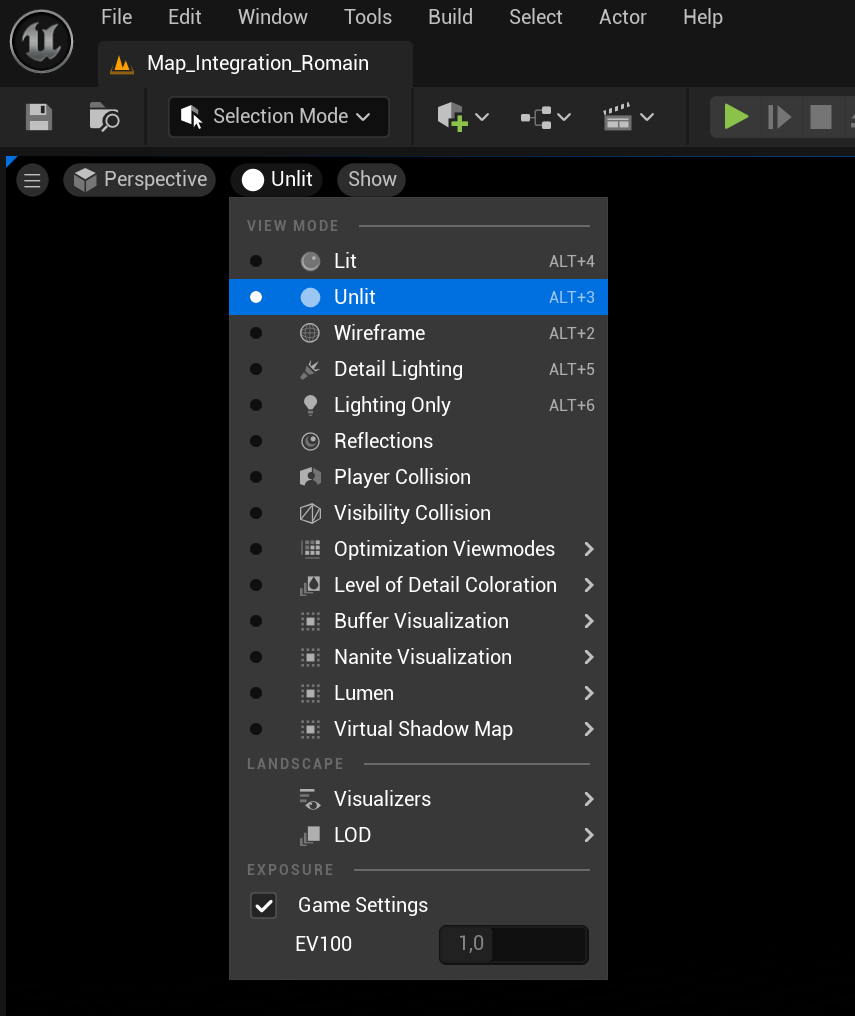
Since we don’t have any lights yet, we can toggle on the Unlit view mode by pressing Alt+3 or doing it manualy.
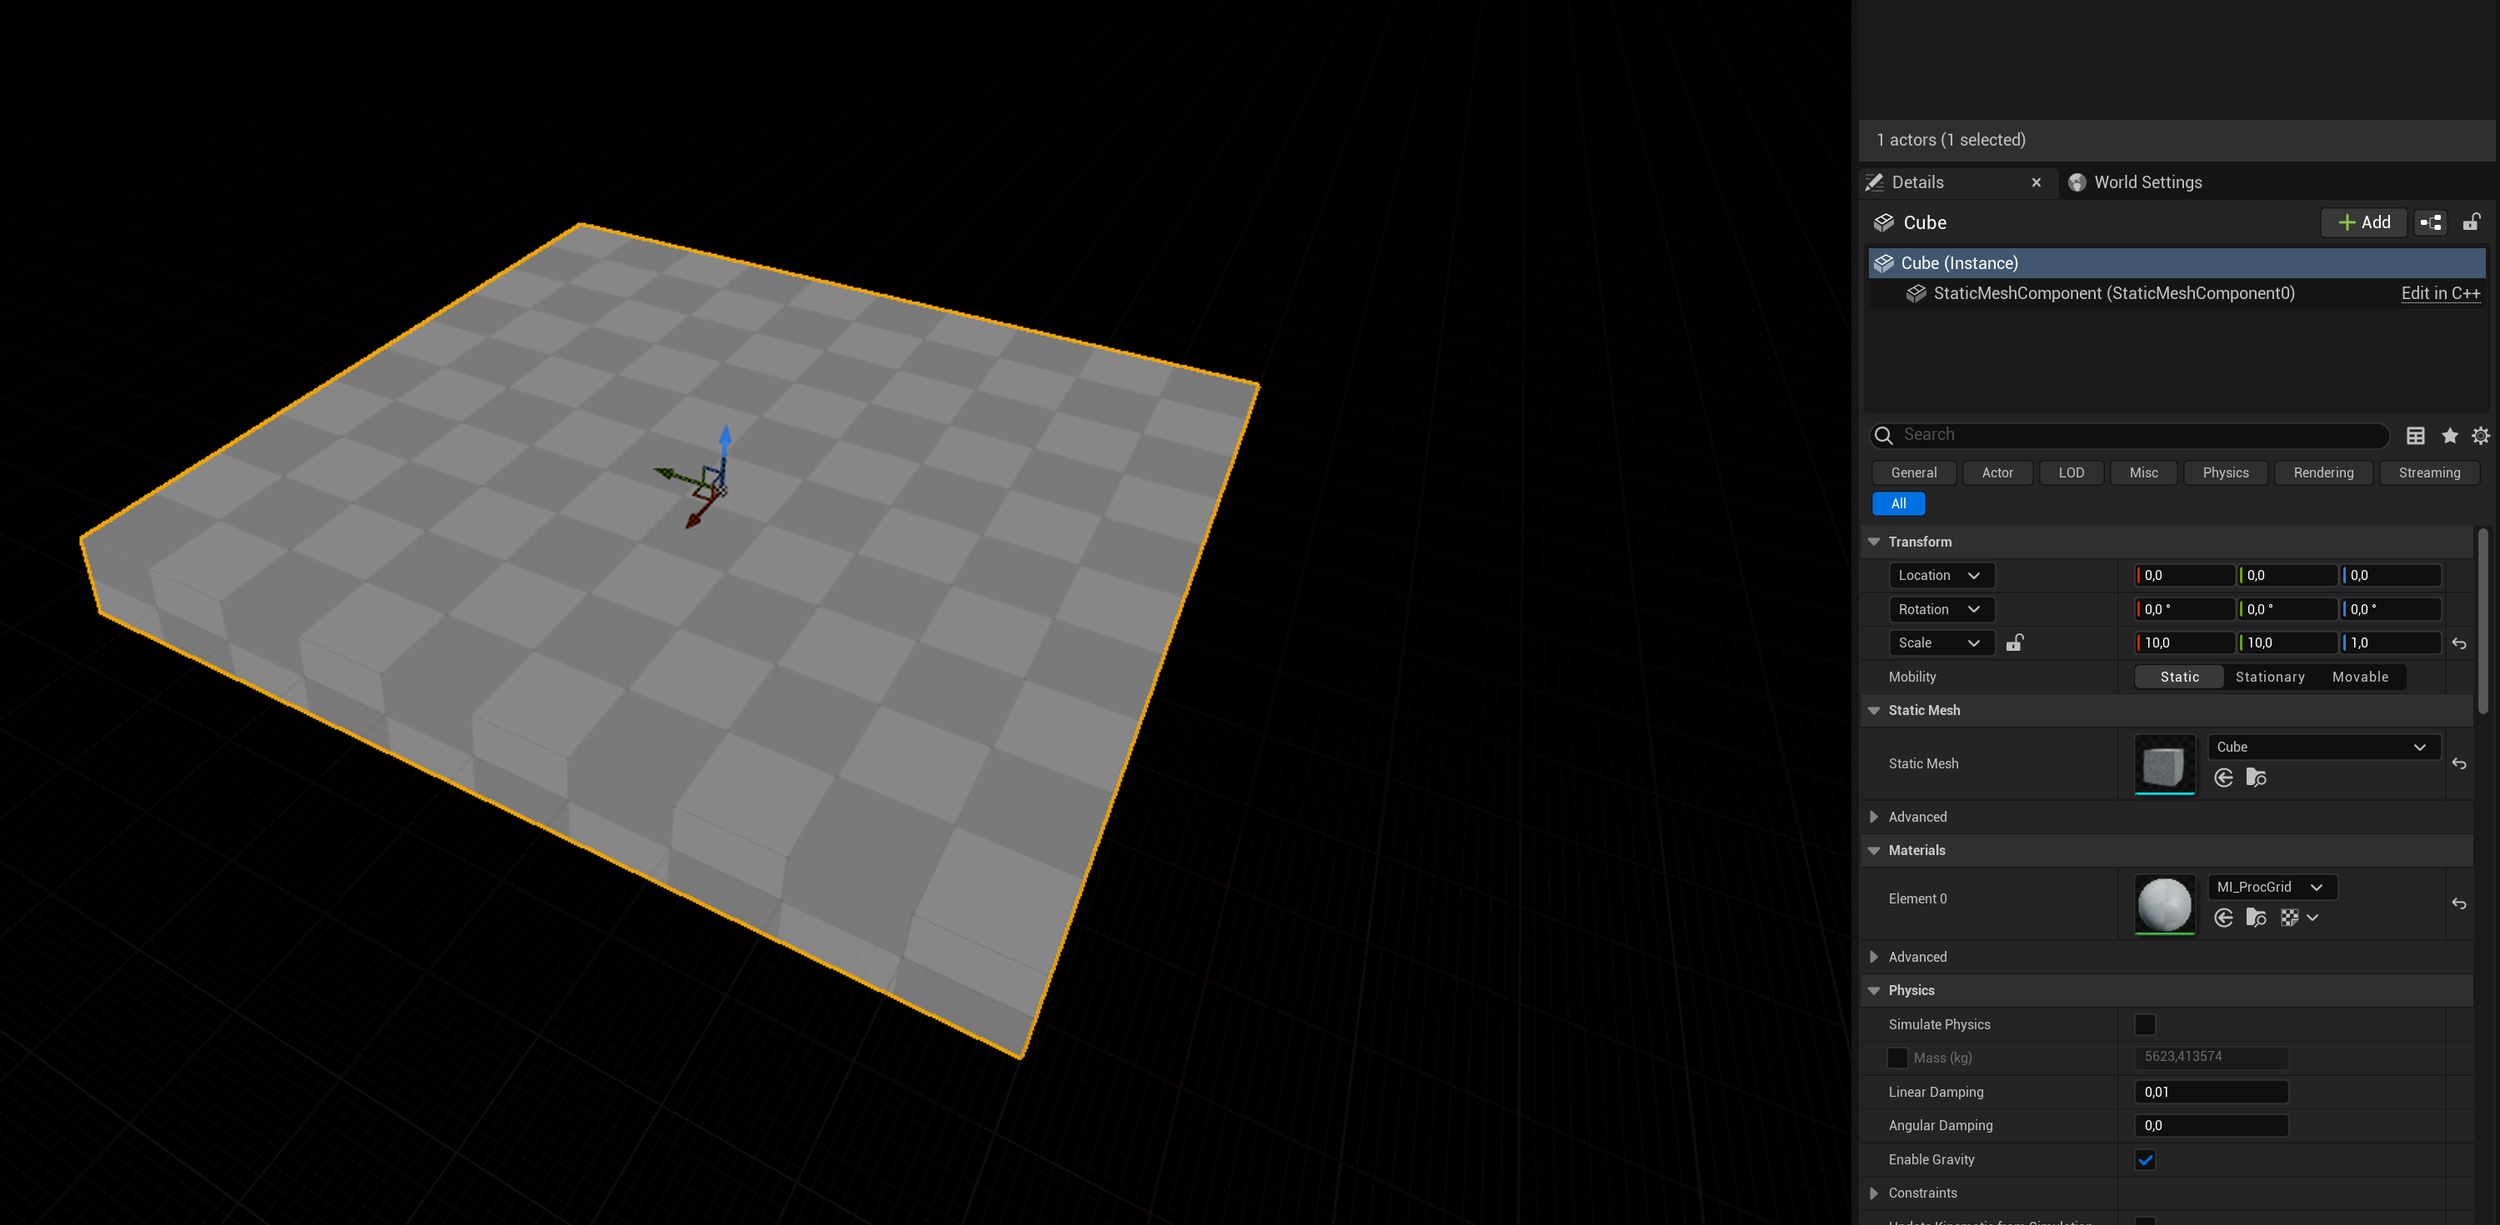
We will want to have something for our assets to be sitting on, let’s create a cube and make it “10.10.1” meters using the scale values in the Transform panel, let’s also apply a material to it, Unreal is giving us a basic grid one that we will use for this tutorial called MI_ProcGrid. We also want our cube to be in XYZ location “0.0.0”
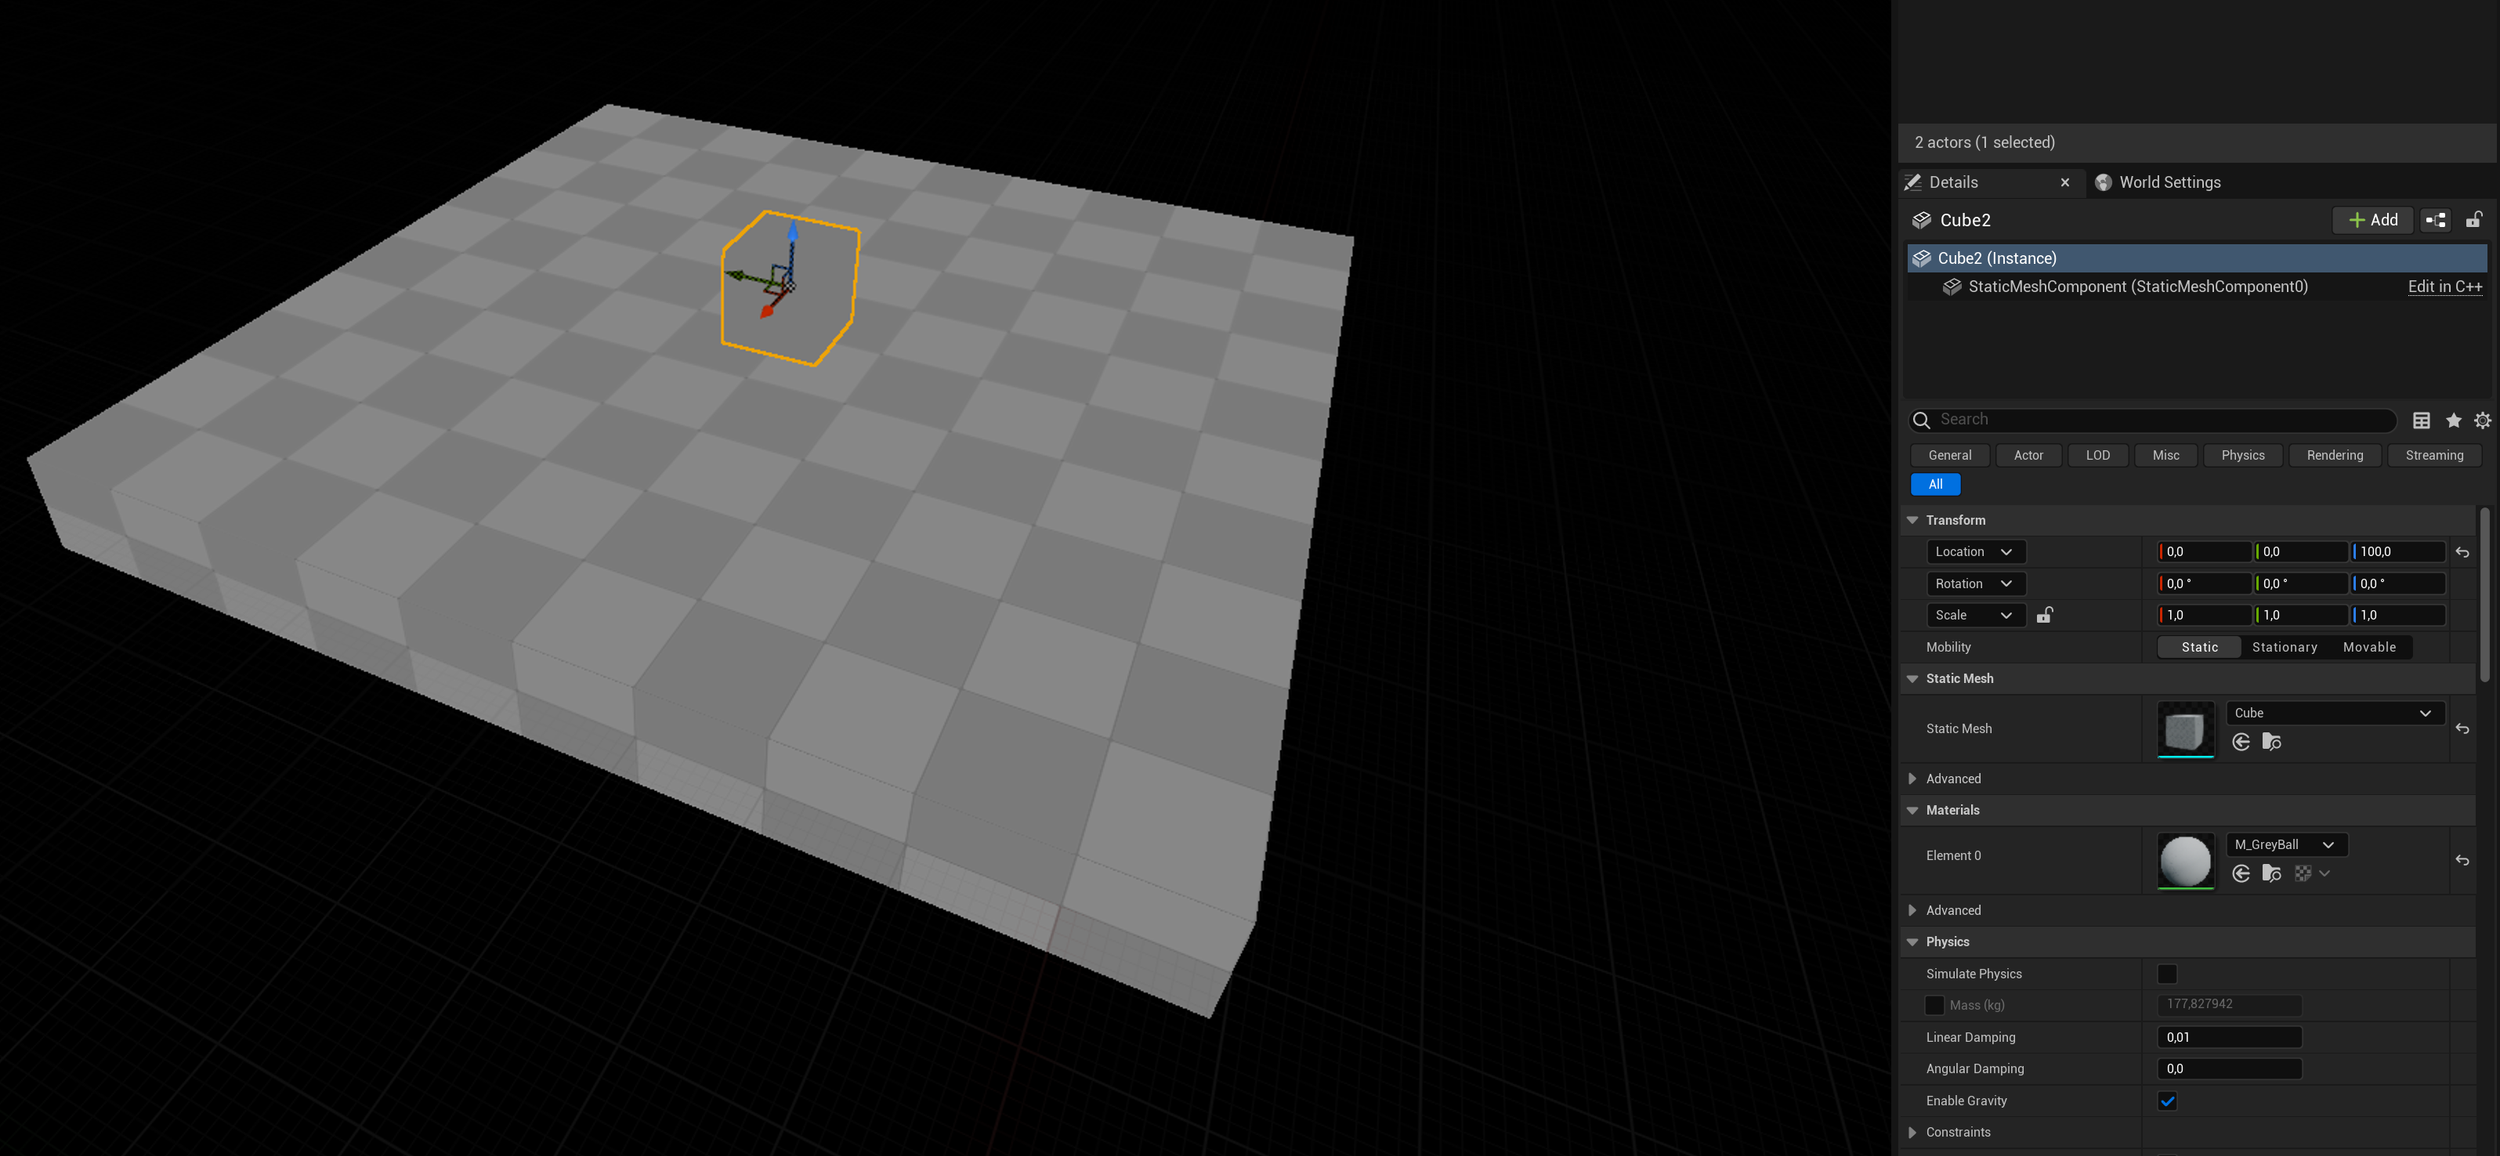
Let’s also create another cube, scale it “1.1.1” and have it in position XYZ “0.0.100” The value 100 is because UE5 units are in cm. We will apply the M_GreyBall material to it this time. (The Greyball is using a mid grey value which will be a good reference for our texture brightness.) Having a one meter tall cube in a scene can be used as a nice scaling check tool, you can also use characters made for your project if you have any.
It’s a good practice to always keep in mind scaling (Either for pure realism between objects and characters, respect of the art direction but also for metrics and gameplay)
Step 1I : Setting up the Neutral Light Scene
Now that we have something to look at and put our objects on, we need something to lit it! We will create what we call a Neutral Light scene which we will stream inside our Persistent map that we just created.
Let’s create a new empty scene again and call it Map_Light_Neutral.
In that map, we will want to have :
A Directional Light
A Sky Light
A Post Process volume
An Exponential Height Fog
An SM_SkySphere static mesh that you can find in the Engine Content. (In order to access the Engine Content go to the settings of the Content Browser and check on “Show Engine Content”
With everything that we added to the scene, here’s the parameters that we will want for them :


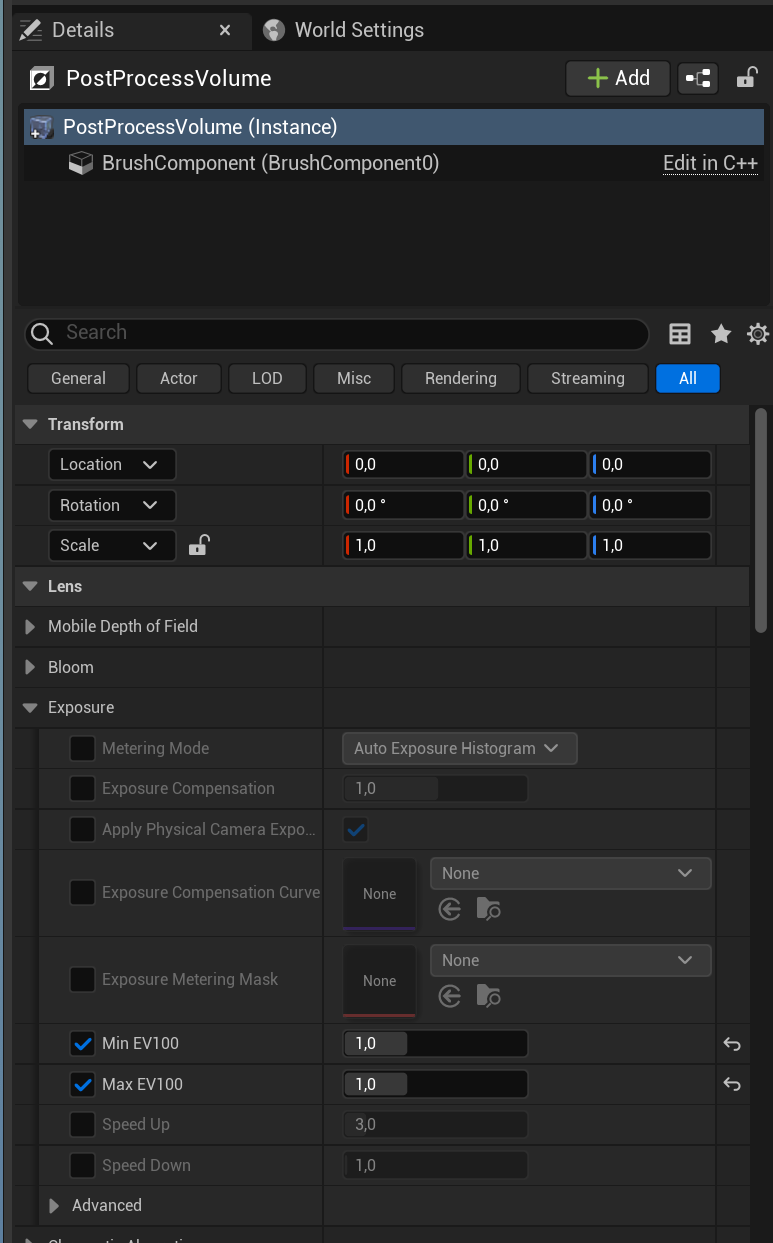


The neutral light gives us the most basic, boring, grey light possible which is a nicely baseline for testing our PBR values and also creates a nice light scene template that we could duplicate to create others. We also removed auto exposure in the post process in order to not have our luminosity being changed by it. Our point is to answer the following questions:
Are my textures bright enough (We want them to be close to a mid grey)
Are my PBR Values good?
Are my Normals working?
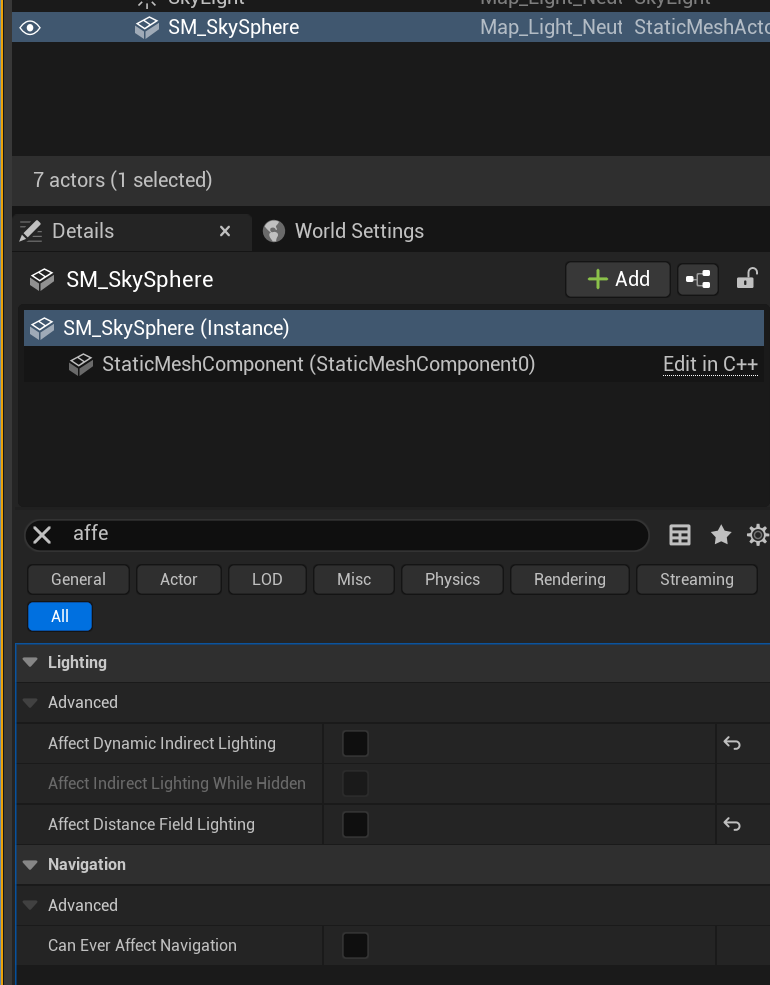
One final step before calling this done is to disable both affect Distance Field and Indirect Light on the Skysphere Static mesh. You can find those parameters easily by searching for “Affect”
Step 1II : Streaming our Light.
In order to be able to have multiple light scenarios and separate the art from the light (which is done a lot in production) we will want to use what is called “Level Streaming” We will basicaly load our light as a sublevel of our Persistent one. To do so, let’s re-open our Integration map first, and find the level window. (Don’t forget to save the light map!)

You can find the level window in “Window > Levels” Clic the “Levels” button and then let’s press “Add Existing”
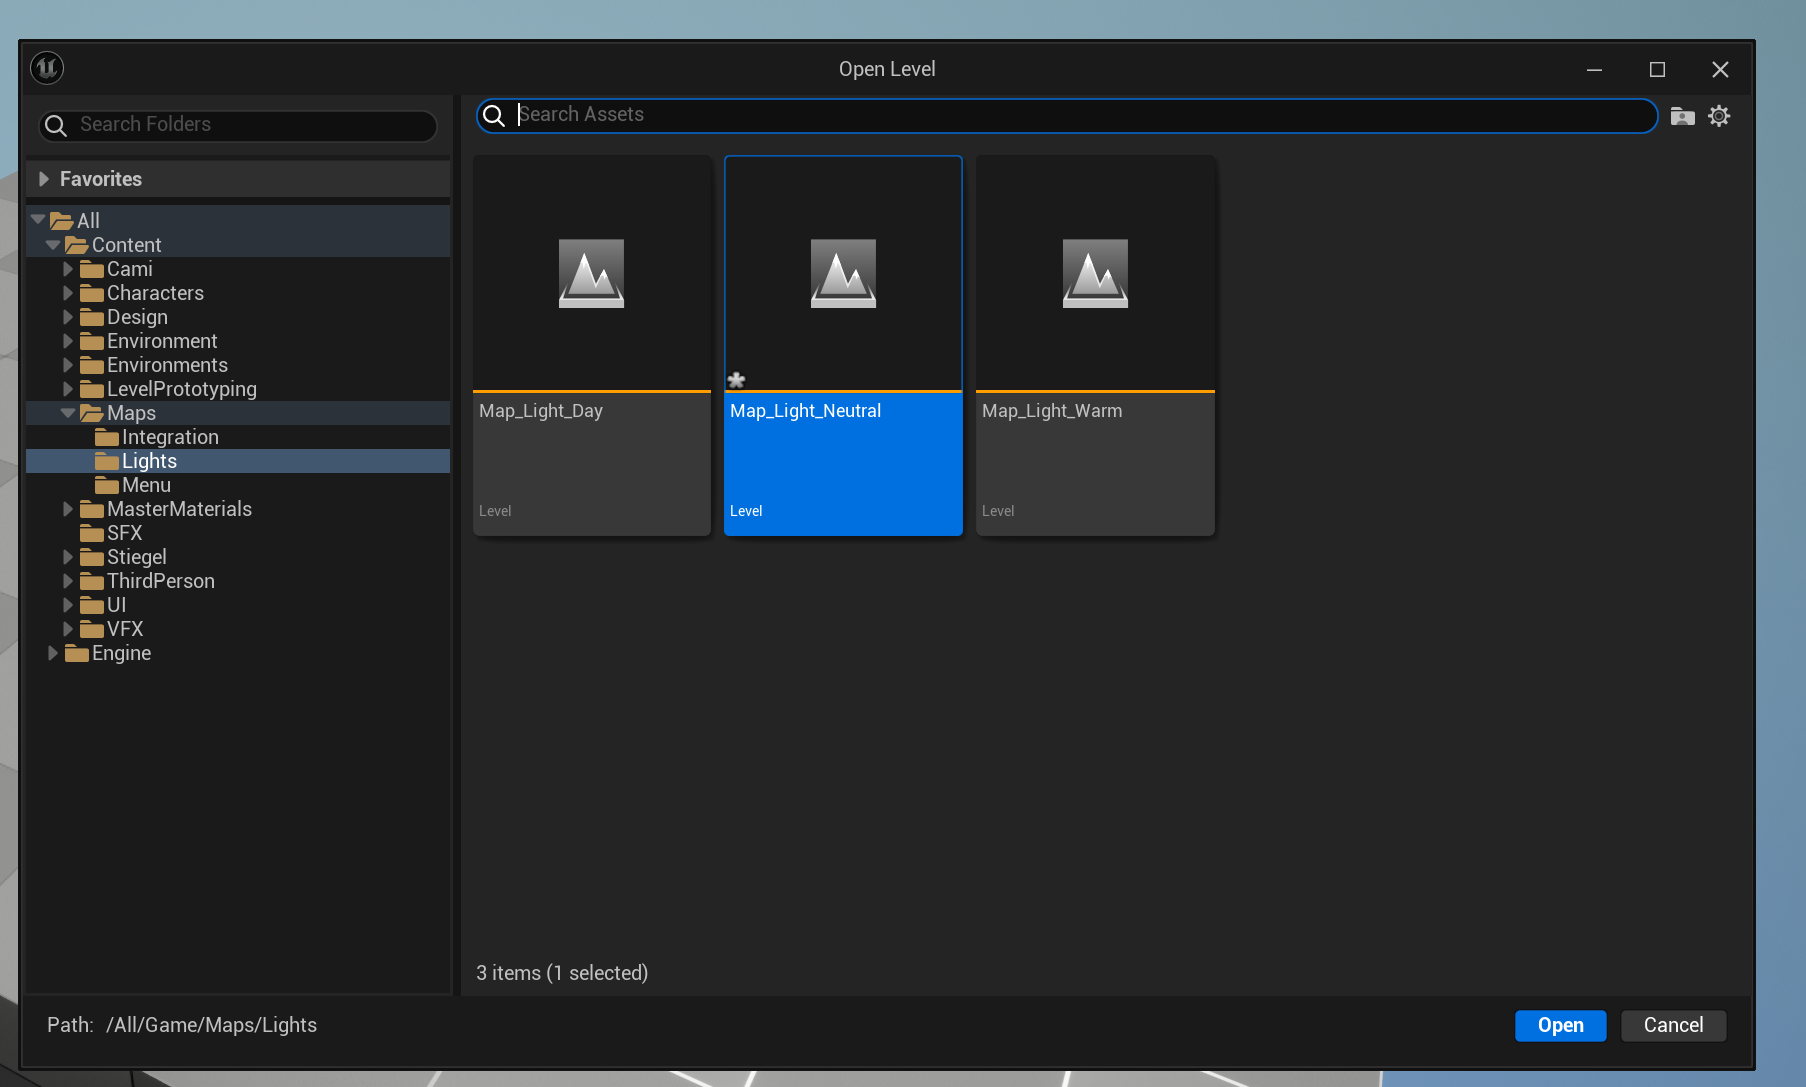
This will give us the option to browse and open a Level, let’s find our Map_Light_Neutral that we created earlier and where our directional light, skylight and other light related objects are sitting.

What used to be just two unlit cubes is now being lit by our lights that we created in a separate scene! You can also see that the Light map is now a child of the Persistent one in the hierarchy, it is also being displayed in Blue which means that it’s the one that is selected/we are working in. You can double clic on the persistent to select that one and make it the active one.
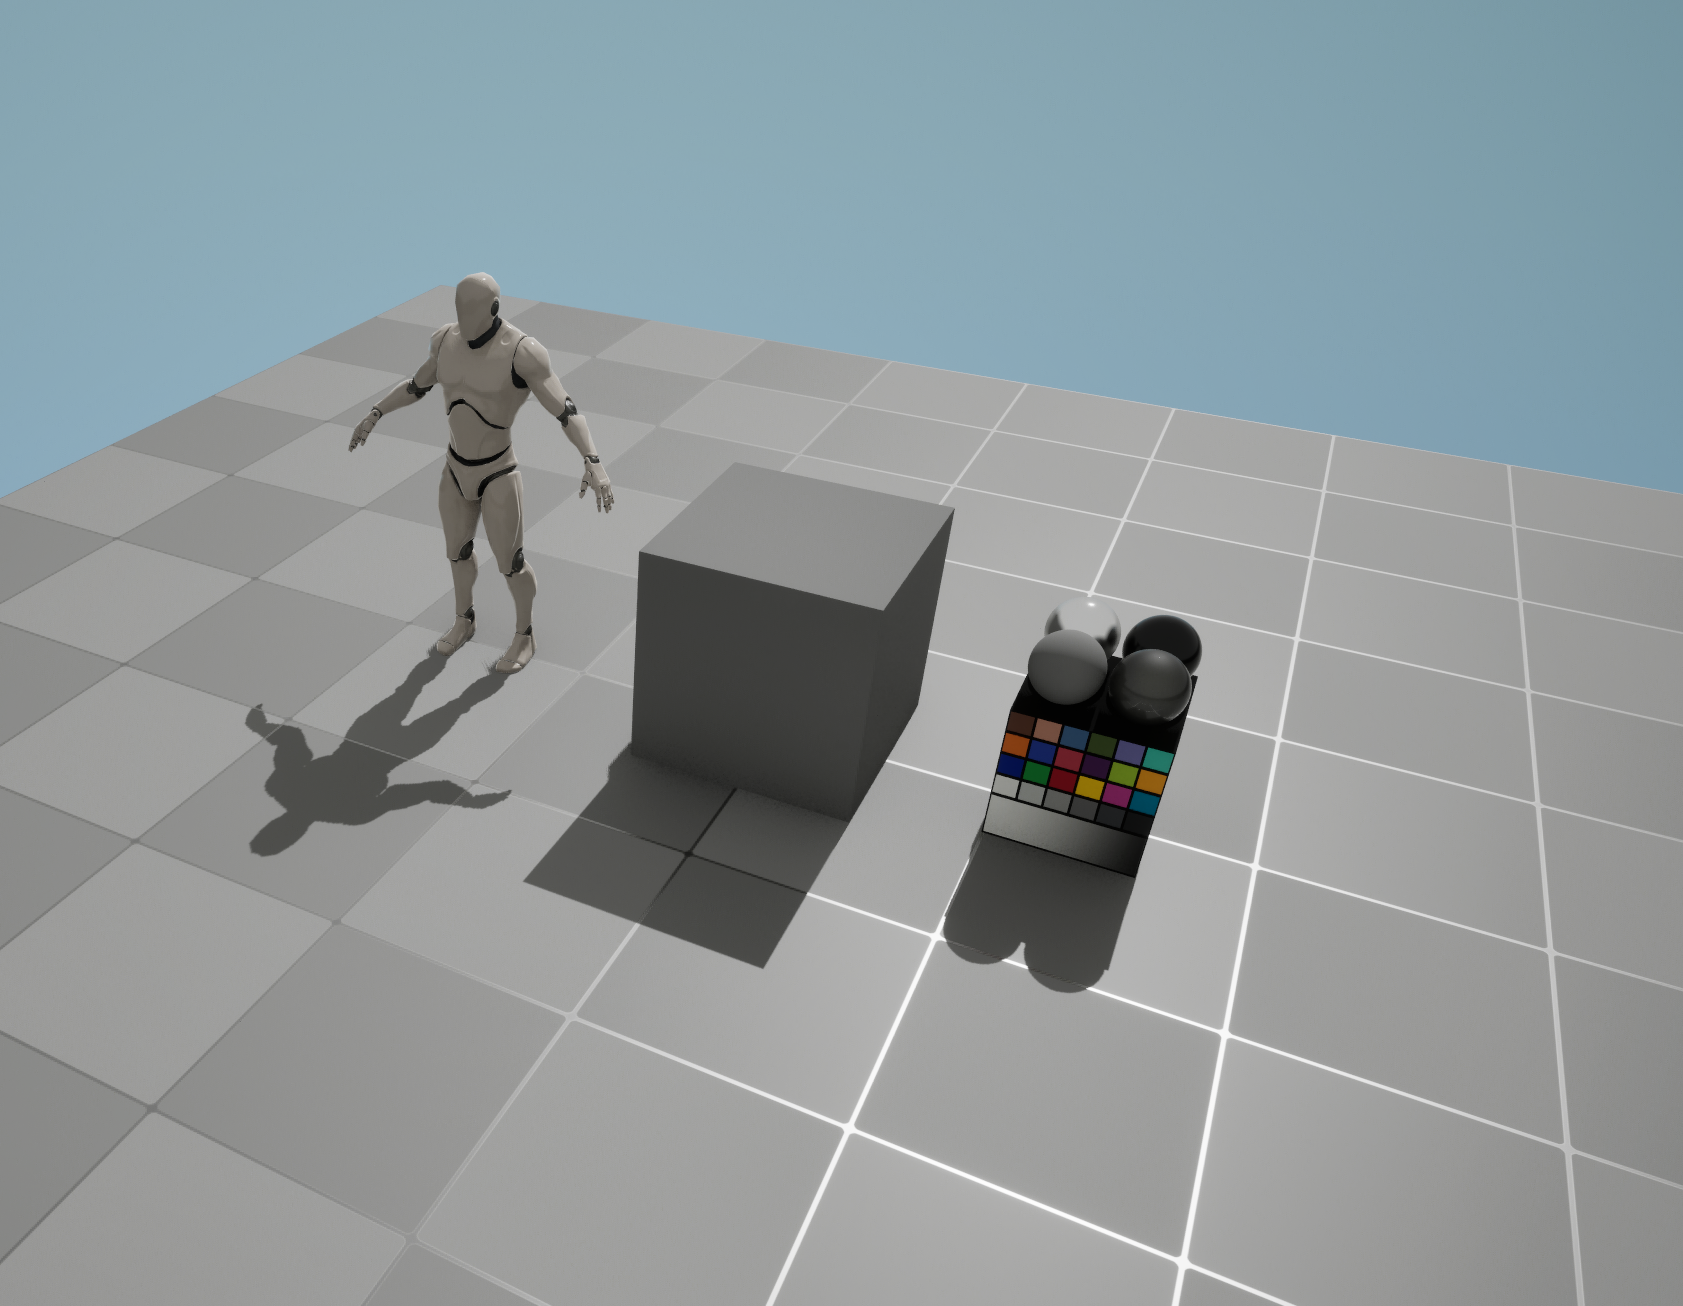
We can also add a basic SK_Mannequin as a scale checker if you don’t have a custom character (you can find those in the Feature/Content Pack on the ThirdPerson Template) This Mannequin is 180cm tall.
Another great object to have in your scene is SM_ColorCalibrator that you can find in the Engine Content, it has color values, sphere with different materials and it’s a good baseline of comparison.
When a level is selected/active (in Blue) what you will drag and drop will be placed in that level, be carefull not to import art assets in the light levels! You can see in which levels your objects belong to in the outliner. You can find good practices and explanation on level streaming on the Official Documentation
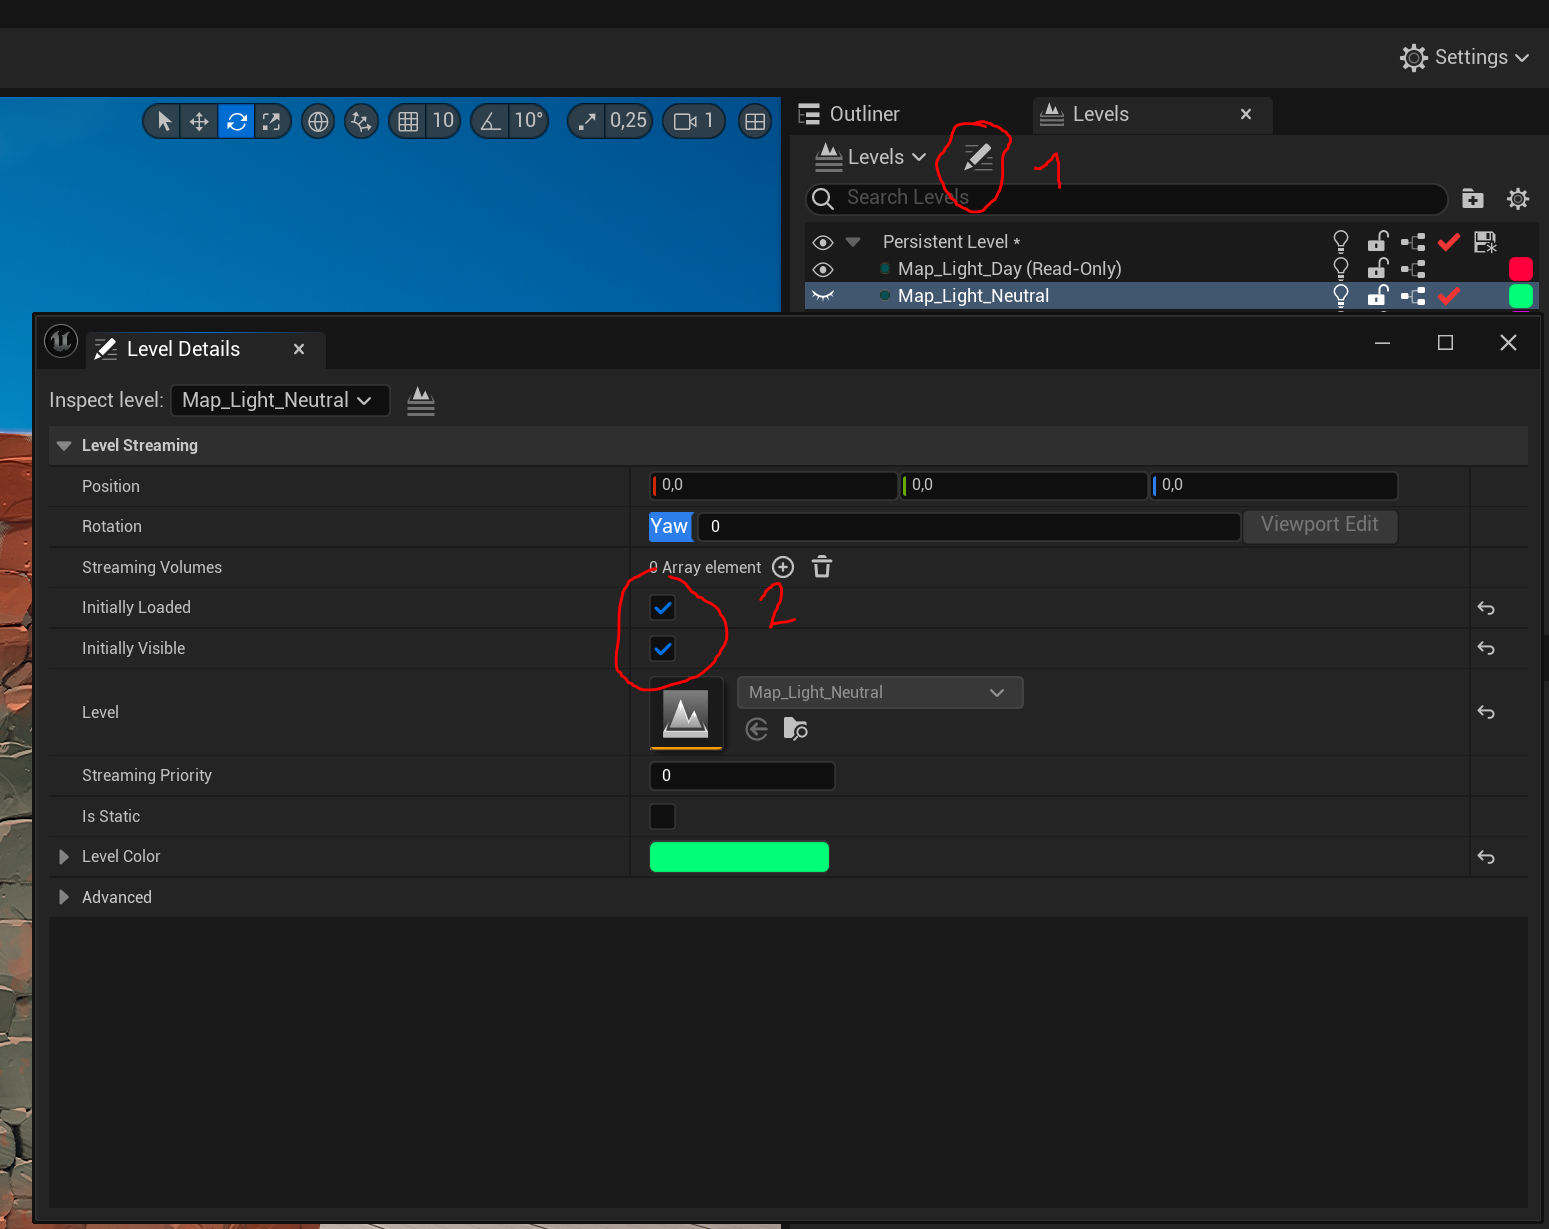
If we were to launch the PIE, nothing would show up, we need to tell the engine to load and display our light map, in order to do so, find the Level Details button and check on Initially Loaded and Initially Visible.
You can make a copy of your Neutral light map and adjust the settings to make different types of light scenarios, like night, evening, morning, noon or cloudy/rainy days. Save these copies to try out your assets in various situations! Once you have multiple map being loaded in the persistent, you can toggle on/off their visibility in the Level Window, if you need them visible in game reminder to change the “Initially Visible/Loaded” Parameters/.
Now that you have multiple scenarios, checking if your materials are nicely reacting is easy! You can also keep multiple objects next to each other and check on the amount of detail, the values of your PBR maps, the scale between them and the characters of your game! Check AS MUCH AS POSSIBLE your art in Engine, it’s cool to have a nice Marmoset/Substance view but what matters is how your asset looks in Engine!
When working on an asset, run around it, rotate around it, test it in different environments, the more the better!

As a game artist, your job is to make things work for THE GAME, not create a portfolio piece.
First Version made on 11/02/2024